Docker
1 | docker-compose build |
1 | systemctl start docker |
1 | systemctl enable docker |
1 | sudo systemctl stop docker |
If there is warning like: Warning: Stopping docker.service, but it can still be activated by:**
1 | docker.socket** |
So we can stop the socket
1 | sudo systemctl stop docker.socket |
1 | systemctl enable docker |
1 | systemctl restart docker |
1 | sudo docker-compose up |
项目中架起docker环境
1 | docker system prune |
Cuda
nvidia-smi
Issue 1:
1 | NVIDIA-SMI has failed because it couldn't communicate with the NVIDIA driver. |
1 | sudo apt install dkms |
Check the NVIDIA number:
1 | ls /usr/src | grep nvidia |
This will solve this common issue.
Install the CONDA for WSL2
Please follow this link:https://docs.nvidia.com/cuda/wsl-user-guide/index.html
1 | wget https://developer.download.nvidia.com/compute/cuda/repos/wsl-ubuntu/x86_64/cuda-wsl-ubuntu.pin |
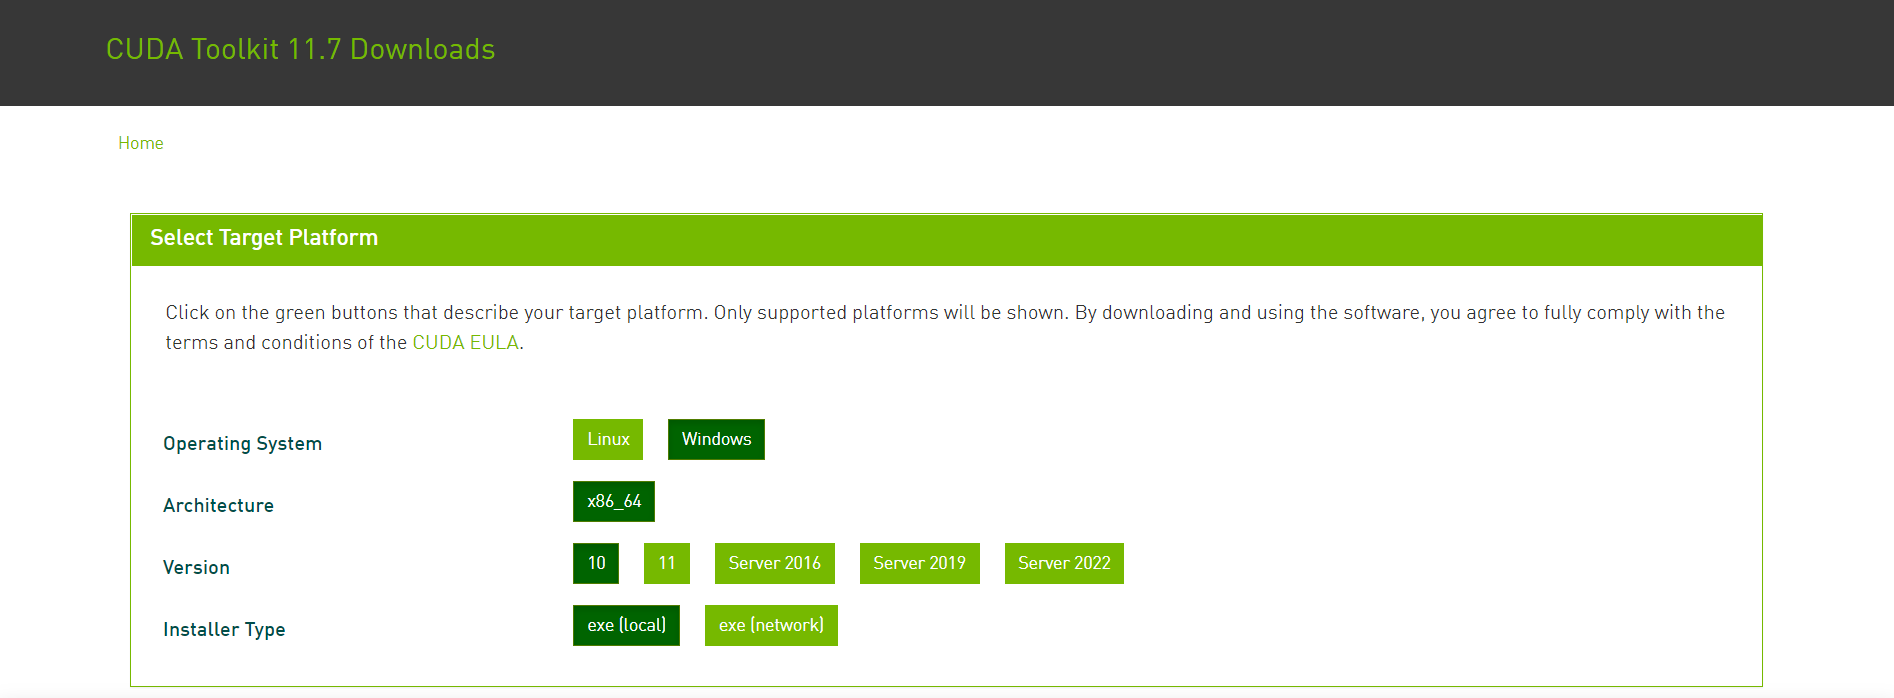
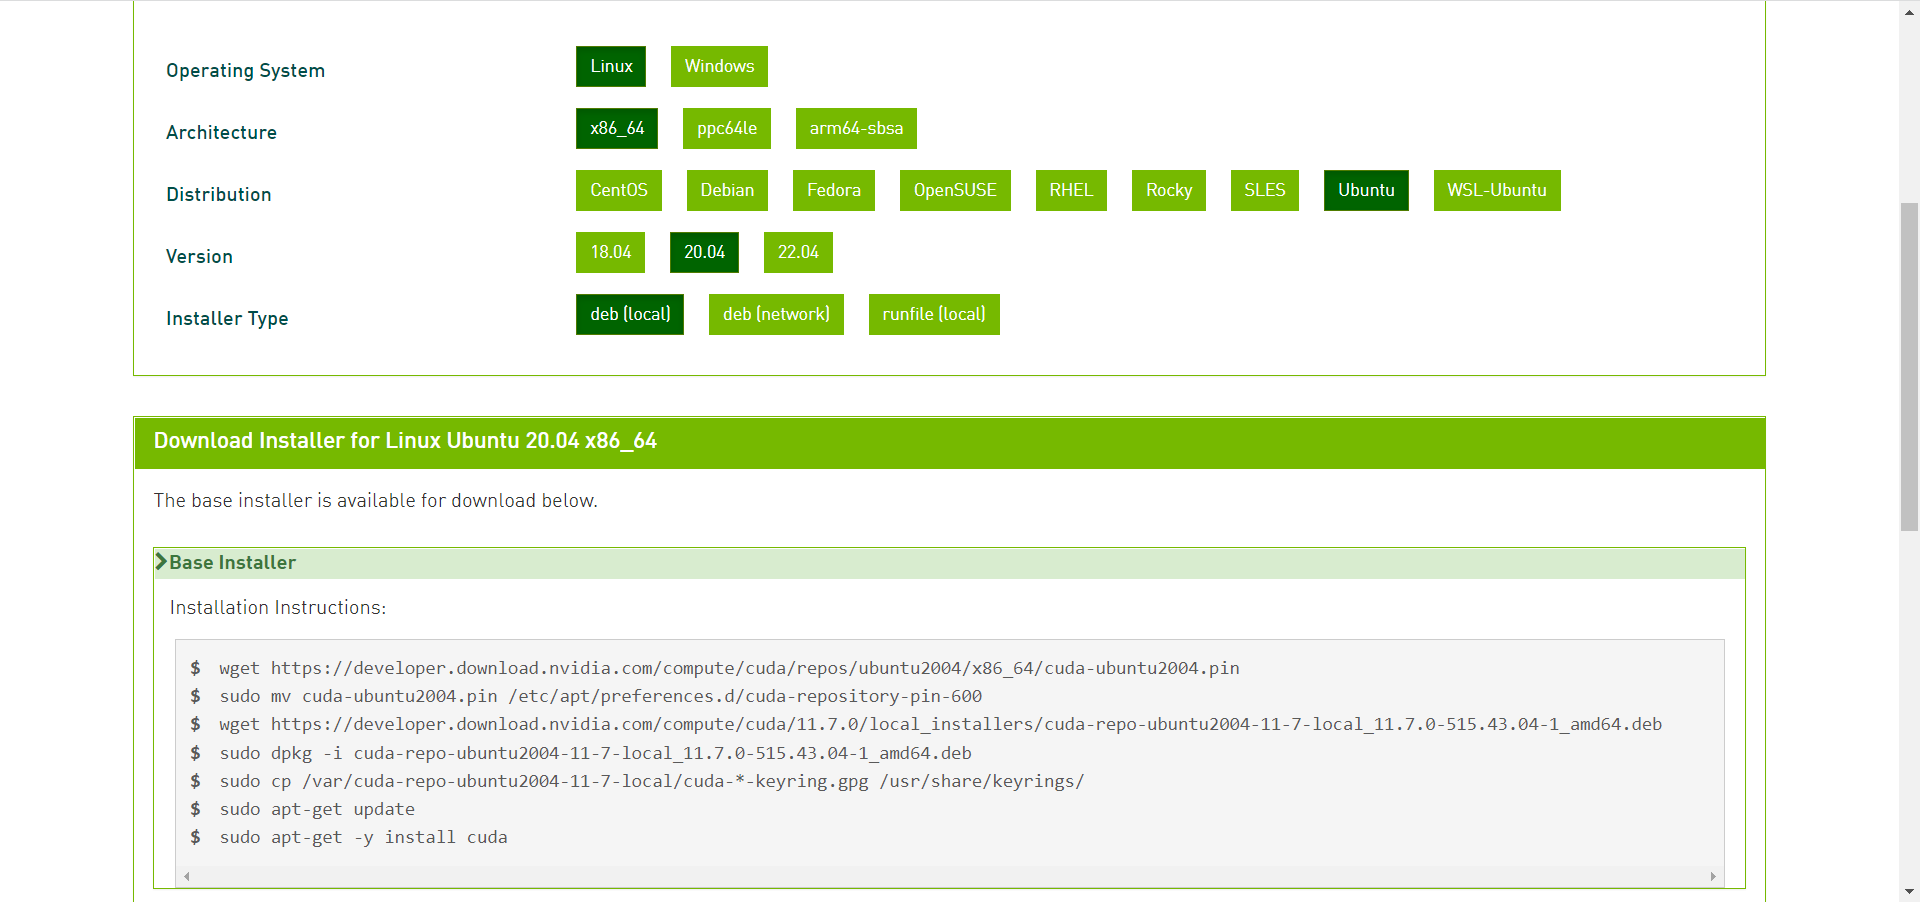
or Installation of Linux x86 CUDA Toolkit using Meta Package:
1 | wget https://developer.download.nvidia.com/compute/cuda/repos/ubuntu2004/x86_64/cuda-ubuntu2004.pin |
Check the environment by:
1 | nvcc -V |
If there is nvida not found, it should be the environmental problem:
Set the environmenal Inside of the .bashrc file, update the path as follows: export PATH="/usr/local/cuda-11.7/bin:$PATH" export LD_LIBRARY_PATH="/usr/local/cuda-11.7/lib64:$LD_LIBRARY_PATH"
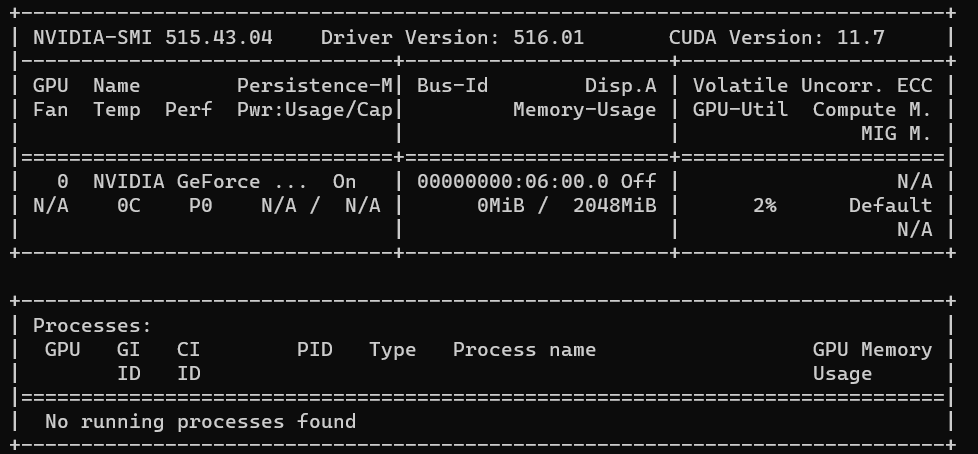
Check the nvidia-smi:
1 | nvidia-smi |
WSL
Check the version of wsl
1 | wsl -l -v |
Update from wsl 1 to wsl2
change the default version into wsl2.
1 | wsl --set-default-version 2 |
1 | wsl.exe --set-version Ubuntu 2 |
Anaconda
This will show how to install the anaconda at the Ubuntu system:
The first step should be wget the downloaded file:
1 | wget https://repo.anaconda.com/archive/Anaconda3-2022.05-Linux-x86_64.sh |
If there is a conda not found problem, we need to fix the environmental variables:
1 | # check the bashrc file |
Create a Python Env
1 | # create a conda env name "env_name" |
Environment.yml
This is an example of environmental.yml from shennong package.https://docs.cognitive-ml.fr/shennong/index.html
1 | name: shennong |
Pytorch
Install Pytorch
We need to install the pytorch:
1 | pip3 install pytorch |
Check the Version of the Pytorch
1 | import torch |
Heroku
Create a heroku server.
1 | heroku create |
Push the original codes into the empty projects.
1 | git push heroku HEAD:master |
Linux Environment
1 | # from https://github.com/kaldi-asr/kaldi/issues/515 @ willendzw |
AWS Ubuntu EC2
We can use the AWS and install it by this video tutorial: https://www.youtube.com/watch?v=NuB2BTYNosE&t=81s
1 | # Connect the ec2 server to ssh |
Librosa
Here is the scripts that installed in case that it will be facing the incompatibale issues for librosa installing.
1 | conda install -c numba numba |
Here is one example:
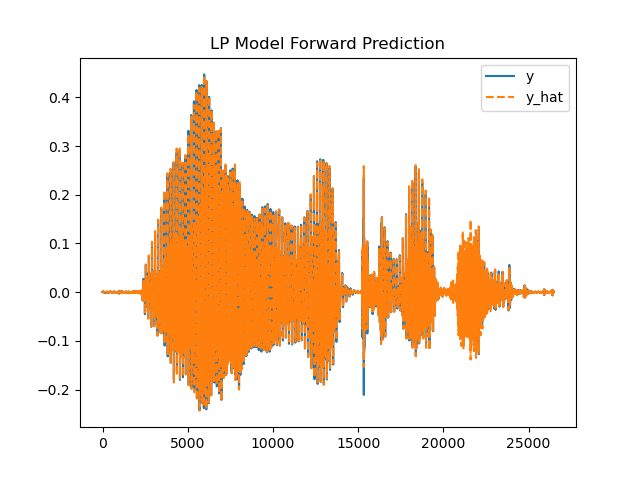
1 | import matplotlib.pyplot as plt |
The saved png file can be looks like that:
Here is a very good tutorials to express the librosa in the speech recognition and processing tasks:
https://medium.com/wavey-ai/end-to-end-speech-recognition-f13f0d0197c7