1. Use Wenet to train the ASR E2E Model
1.1 Pre-trained Model
We can Download the pre-compiled runtime wenet mode from the wenet github, since they already shared the pre-trained runtime model https://github.com/wenet-e2e/wenet/actions/runs/2175816175 their, so we can just use it instead of compile for ourselves.
Wenet supports the .zip model to decode the ASR outputs. If you do not need to train your model yourself, then you can try this step.
1.2 Self-trained Model
If you want to train your model, you can try to run an example project just like kaldi wsj examples. In Wenet, since it was created mostly for Chinese ASR tasks, so we will use a Chinese corpus to be the example. But Wenet still supports other languages like English, so if you still want to do it, it should be without any concern.
In all, this is just an example we can refer, the goal is to know how wenet train the ASR we want.
Here is the offical website for the trainning purposes, https://wenet.org.cn/wenet/tutorial_aishell.html
Also, with the LibriSpeech one: https://wenet.org.cn/wenet/tutorial_librispeech.html
2. Optionally Integrate with the Language Model (LM)
As we know, the wenet will output a TLG.fst decoding model, and then we can just use this model to integrate into the n-gram language model.
Since before we had the dictionary in tokens, but here we are dealing with the word level.
If we use the LM, in most cases the decoding time will be much longer, but also there will be a higher accurancy, but this is not compulsory!
2.1 N-gram LM in Wenet
Wenet use the N-gram LM to help us to improve our CTC DNN model, since if we can add one more LM so we can have a more promissing WER during the decoding.
Compared with the DNN LM, the n-gram model is very easily to implement and light-weighted, which is much faster than the DNN decoding. And at the same time, the traditional n-gram model is not limited to the corpus size, we can even use a very small corpus to build this. Also compared with DNN, we can make our model more controllable, since DNN is very randomize.
In Wenet, we will import the WFST to do the decoding for the LM.
TLG.fst
Just like in Kaldi, we have the HCLG.fst, also in Wenet, we have the same strategy.
T.fst
For T, it means the token, in wenet, it is used for CTC decoding. It is used for:
- remove and manage the blanks, from
-> - decode the multiple tokens output into one sentence, how we manage it? (this is very typically used in Mandarin Chinese, which can be a kind of characteristics of that language.)
L.fst
L is lexicon, since the logic here is to make the input characters into the words, in english can be phones to words.
G.fst
G is grammar, it guides us from the words level into the sentence level. For words, it can be n-gram model.
LG.fst
LG.fst = compose(L.fst, G.fst), we can compose those two fst models into one.
TLG.fst
Finally, we can just compose the LG.fst with the T.fst into a big decoding map.
2.2 Language Model Deployment
Install SRILM
If you want to review more ideas about the SRILM, you can also refer this page: https://www.xiaos.site/2022/07/11/Kaldi-for-Dummies/#2-4-1-write-get-lm-sh-we-need-to-write-aw-shell-script-to-run-and-get-th-lm-language-model
1 | cd wenet/tools |
1 | # the train.txt is the original lexicon file, which includes some words like |
In that case, it will generate a lm.arpa file, and we can vim lm.arpa
Get the .fst with LM ( language model)
Her we need to get into the cd /wenet/examples/aishell/s0 folder and vim the run.sh file.
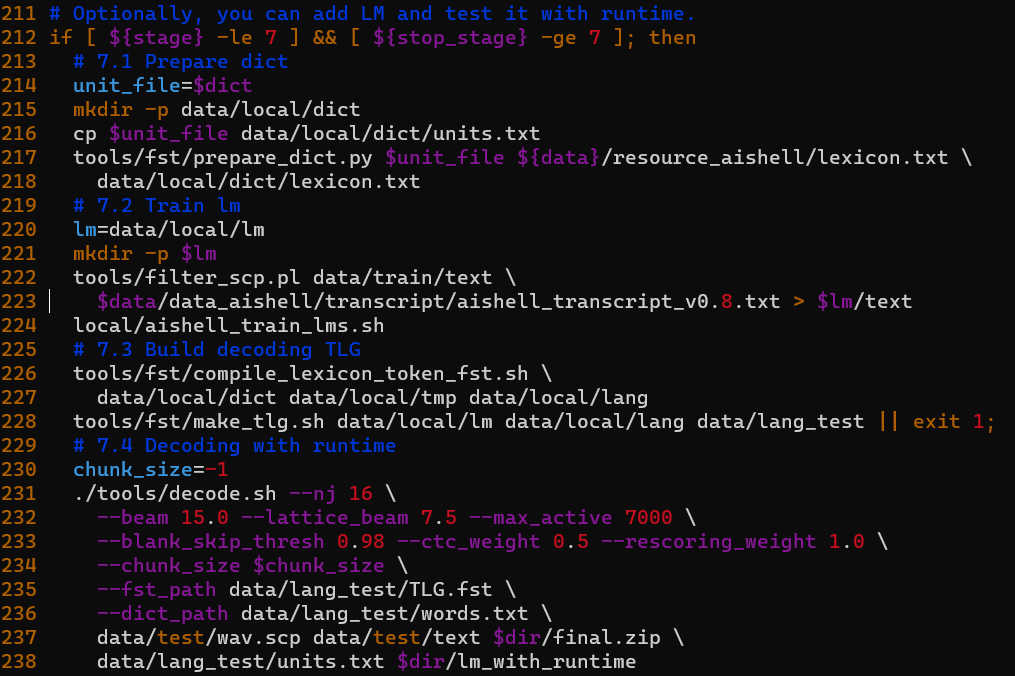
1 | # 7.1 Prepare dict |
In wenet, this is the 7th step in the run.sh, if runs well, we would get :
composing decoding graph TLG.fst succeded
We will compile a .fst file into the data/lang_test/ folder.
3. Runtime Compiling
3.1 Get the pre-compiled runtime from Wenet
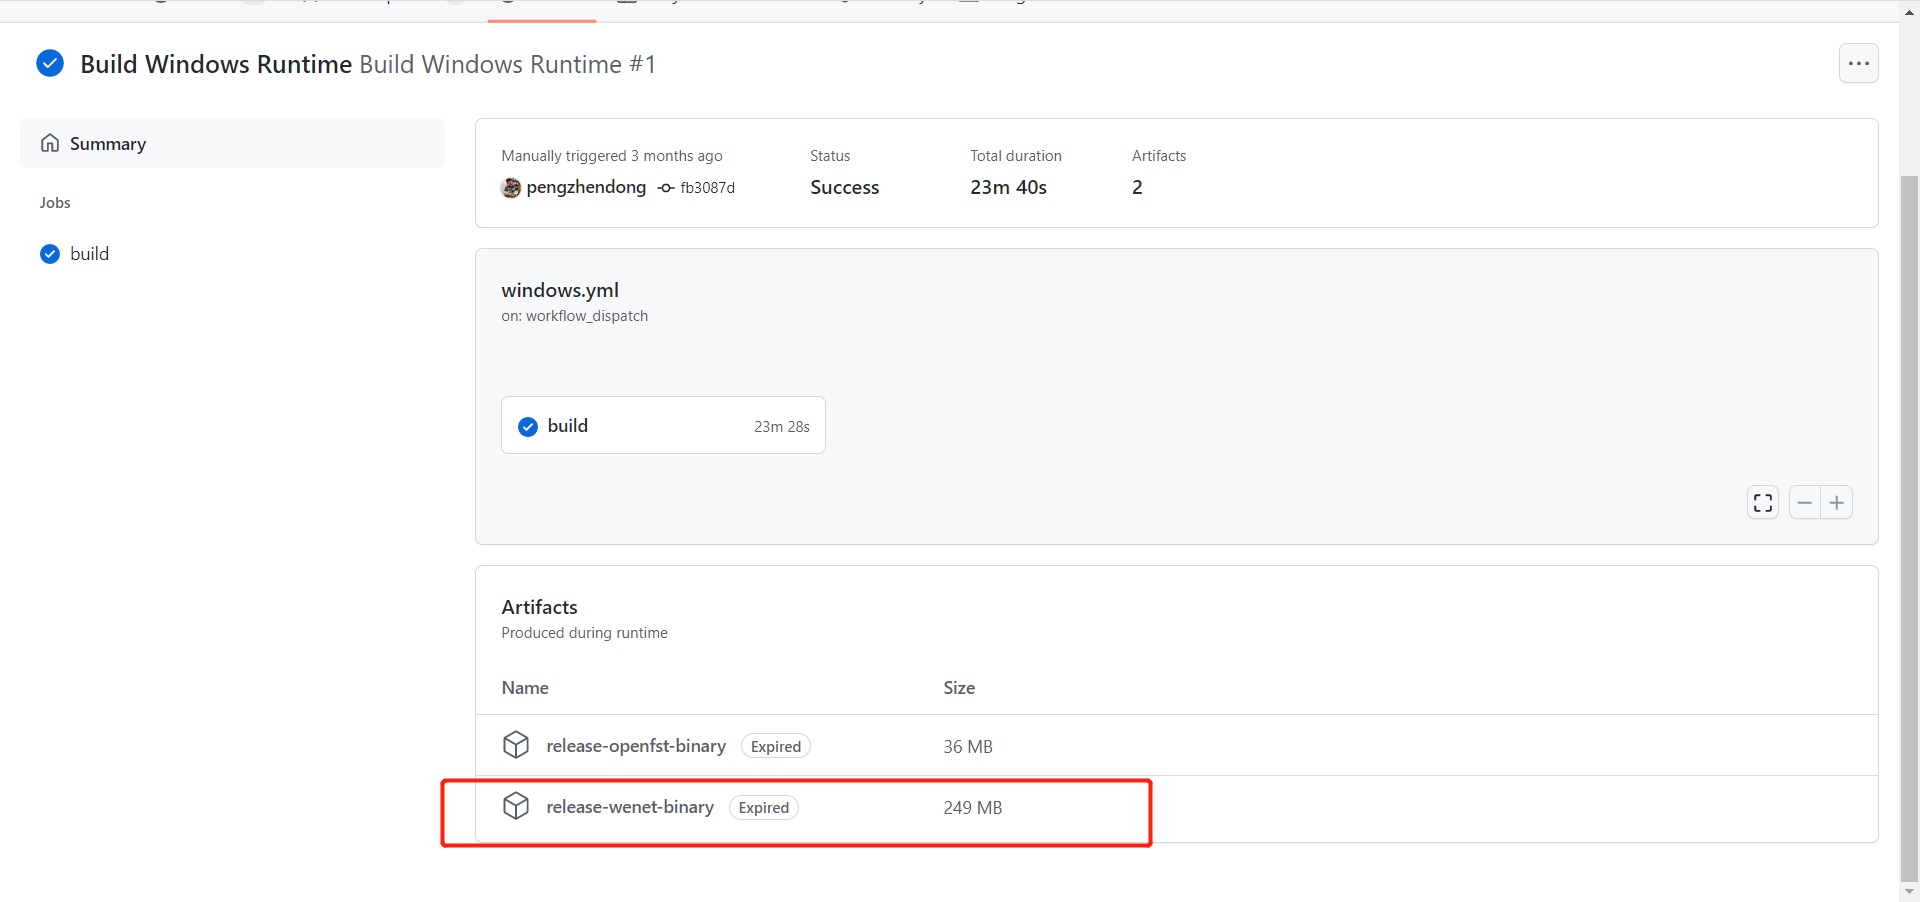
Wenet already gave us a pre-compiled runtime software for us to decode, so we do not need to compile the runtime ourselves, we can firstly use the wenet official released version to help us to do the decoding in the next stage, we can download here:
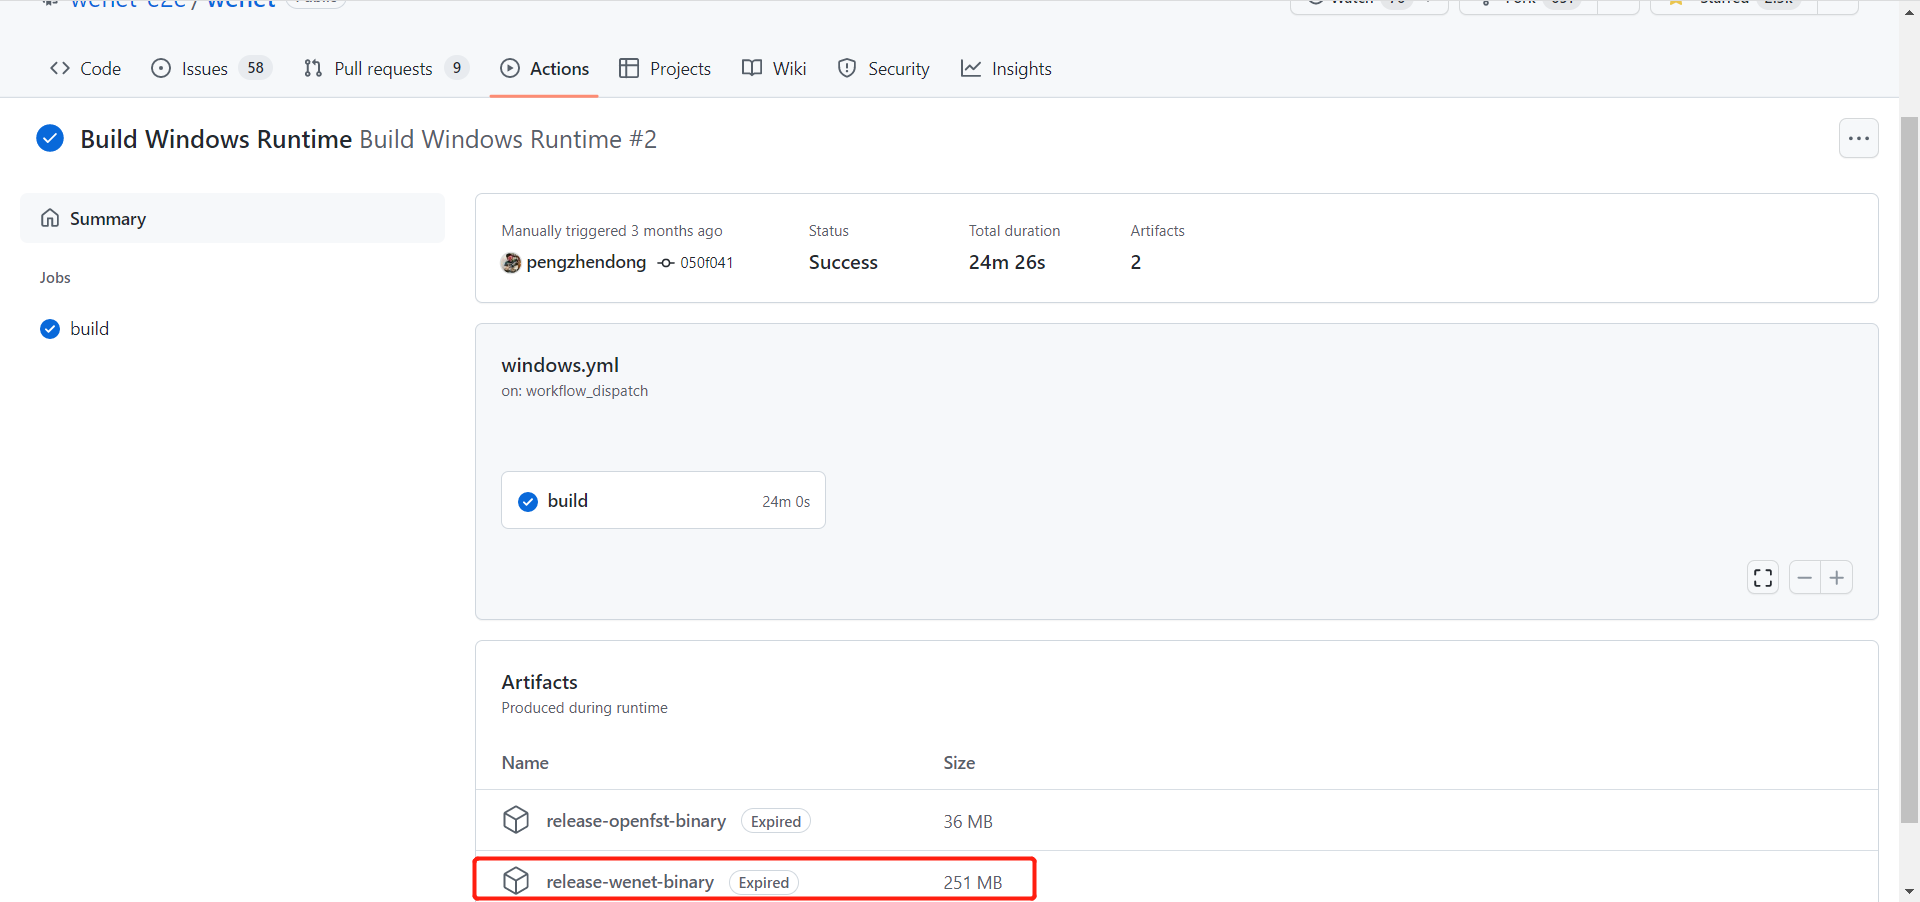
After we downloaded, we can see those documents there:

We will use mostly those three .exe programs with red marks for us to do the decoding.
3.2 Compile at your local machine
If you want to compile your own runtime files on your local machine instead of downloading from the pre-compiled version from the Wenet official release, please check here!
1 | cd runtime/server/x86 |
There is a notice here, we must ensure the cmake is upper than the 3.14 version, and the gcc should be higher than 5.4.
4. Decode the Model
Here is an example, we will use the pre-trained wenet model to do a sample decoding. After we downloaded that pre-trained model, we can just get into that downloaded directory.
1 | cd Downloads/release-wenet-binary |
4.1 Runtime Local Decoding
Here we can do a basic decoding test from our downloaded pre-trained runtime model. The decoding tool is just like decoder_main.exe, but we have to pass in some params there.
1 | --chunk_size the wave chunck streamming param |
1 | ./decoder_main.exe --chunk_size -1 --wav_path ../test.wav --model_path ../20210601_u2++_conformer_libtorch/20210601_u2++_conformer_libtorch/final.zip --dict_path ../20210601_u2++_conformer_libtorch/20210601_u2++_conformer_libtorch/units.txt |
Here is the demo code that wenet gave:
1 | cd /home/wenet/runtime/server/x86 |
4.2 Online Decoding with Host
4.2.1 Runtime Host Decoding with a CMD interface
1 | ./websocket_client_main.exe --hostname 127.0.0.1 --port 10086 --wav_path ../test.wav |
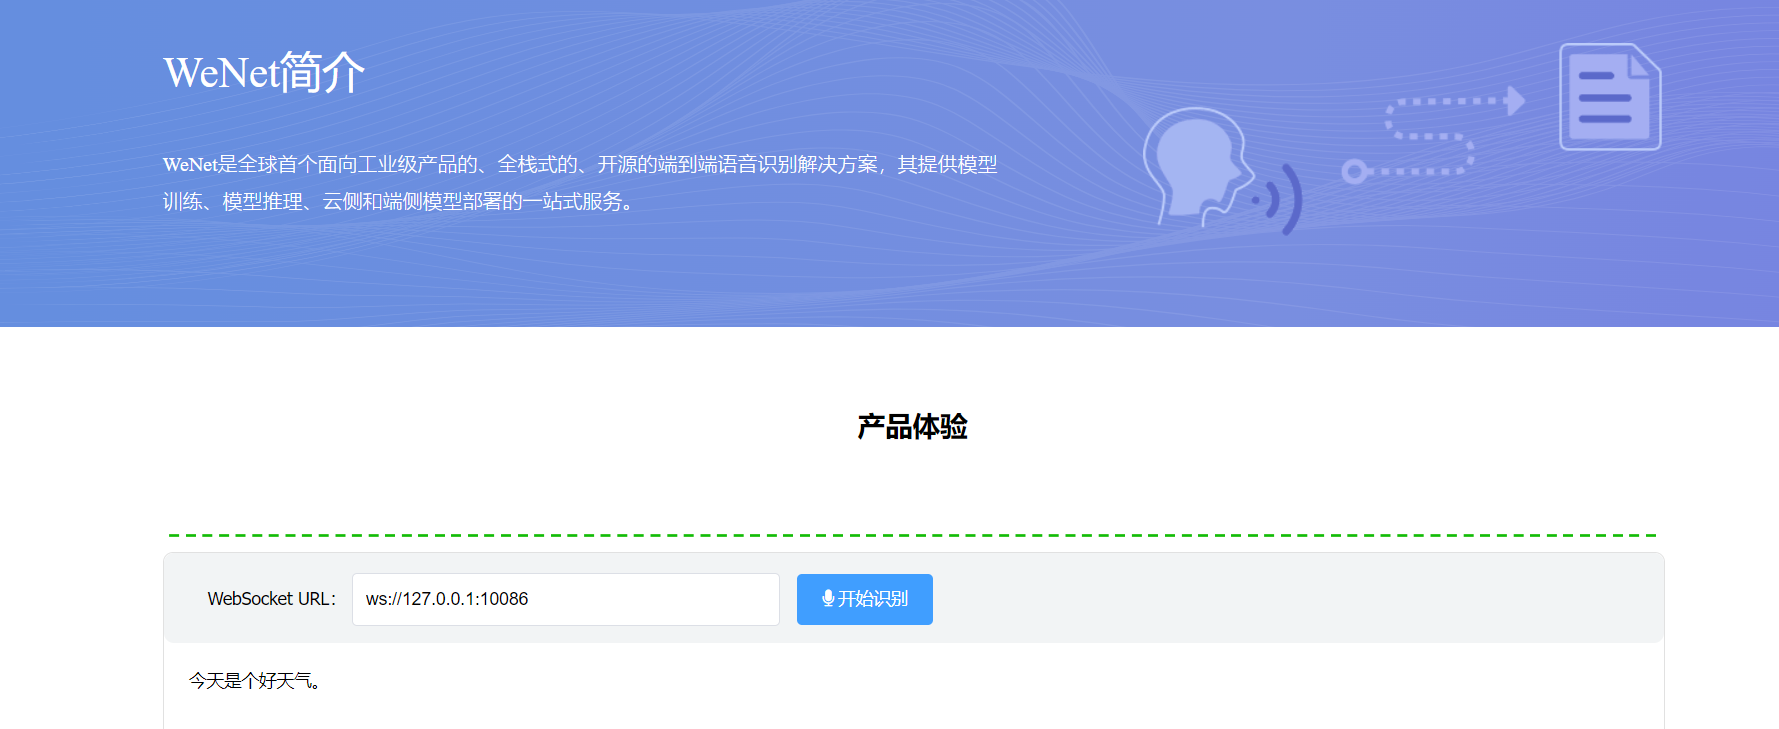
4.2.2 Runtime Host Decoding with a Web interface
Wenet just gave us a great demo for us to do the demo illustration, and it used the Flask.
1 | # here are the code to run the runtime server, right now it is hosted, and we can get the request from that url: ws://127.0.0.1:10086 |
For the server side, it will open a server from the local machine at the 10086, we can then get into the index.html from the flask demo to get the response there.

We need to open the index.html after we already made sure that our ws://127.0.0.1:10086 host is launching.
1 | cd wenet/runtime/server/x86/web/templates |
The blue button here is a Chinese means “start to do the speech recognition”, and after we click the allow to recording, so we can just do the asr tasks here with the streaming and unstreamming modes only if we changed the chunk_size from our decoding cmds.
4.3 Use Python
We can refer this website, it supports the streaming and non-streaming methods: https://github.com/wenet-e2e/wenet/tree/main/runtime/binding/python
Here we just choose a Non-streaming Usage.
we just firstly install the python:
1 | pip install wenet |
We need to write a demo.py:
1 | # demo.py |
5. Hot Word Enhancement
Hot word is contextual (context) biasing, which means we can argumented the specific word we want and make it easily be recognized. This is often occurred within the speech technology.
The common senarios can be recognize: locations, contacter’s name, date or telephone numbers… This senario is always used into the real commercial cases.
In all, the how word enhancement is to give some particular words some kind of more weighting score. In this way, it will make the word we want (hot word) more easily to be decoded.
6. Long-time audio ASR
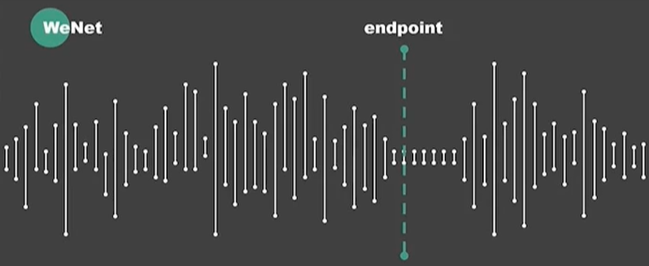
The basic philosophy here for long-time audio asr tasks are very direct, we just divide the big problems into small problems. We have to detect the endpoint for each sentences, just make it in trucks. And after the end-point, we can re-recognize the sentences.
6.1 EndPoint Detection
What is endpoint, endpoint is somewhere that the user will stop at some point, or just the end of the sentences. We can just set the silence threshold of the sentences.
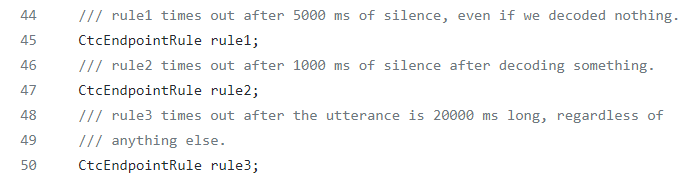
There are three senarios(rules) in wenet:
- Before the speech, the silence in there. Default value is 5000ms (5s).
- Within the speech, the silence there. Default value is 1000ms (1s).
- If the user’s speech trunks are too large, we have to cut it forcelly. Default value is 20000ms (20s).
We can set the params here in wenet.
Here are the core codes here from wenet for Endpoint detection task:https://github.com/wenet-e2e/wenet/blob/main/runtime/core/decoder/ctc_endpoint.h
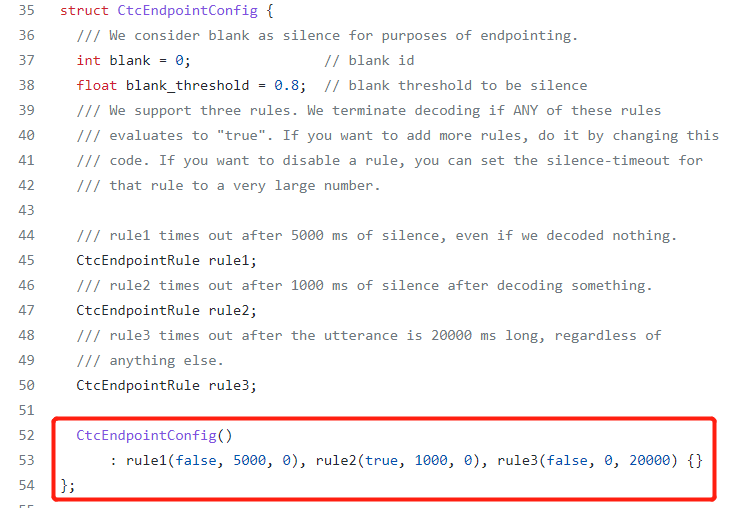
We can define the values we want, the units will be 5000 ms.
The real code for continous blank detection is in here: https://github.com/wenet-e2e/wenet/blob/main/runtime/core/decoder/ctc_endpoint.cc
These are the codes that how it really works:
1 | bool CtcEndpoint::IsEndpoint( |
6.1.1 CTC Endpoint Process
Endpoint Detection
We can check the code here: https://github.com/wenet-e2e/wenet/blob/main/runtime/core/decoder/asr_decoder.cc#L117
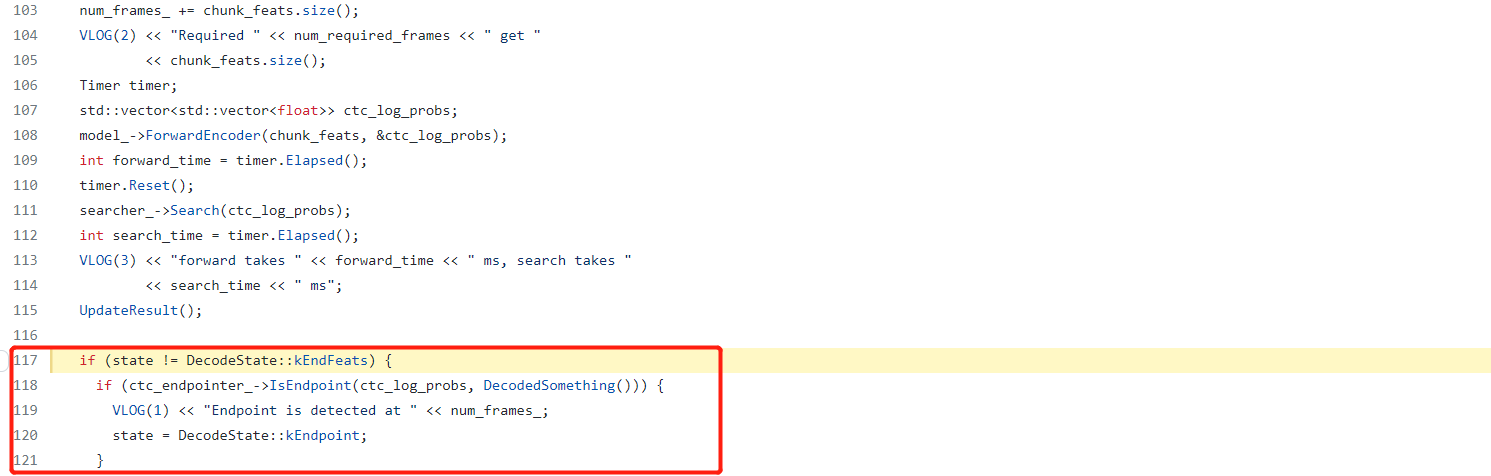
Here the program can detect whether there is a endpoint there.
Rescoring
For Wenet, we have the CTC decoding results to do the rescoring tatics. It will the Nbest scoring, also it will append the recognition results into the original results. 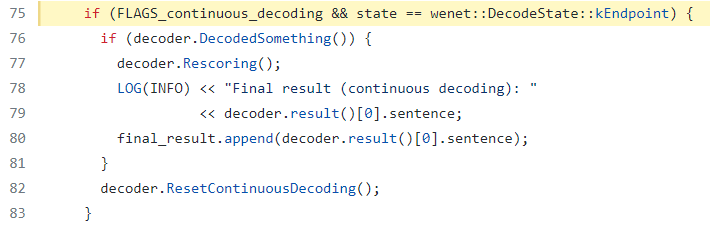
We can detect from https://github.com/wenet-e2e/wenet/blob/main/runtime/core/bin/decoder_main.cc#L75
State Reset
https://github.com/wenet-e2e/wenet/blob/main/runtime/core/decoder/asr_decoder.cc#L67
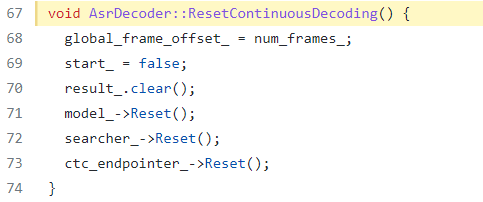
It will do the status reset for the final step. It will clear the status, and ready for the next-stage recognition. It will add a comma “,” for each endpoint.
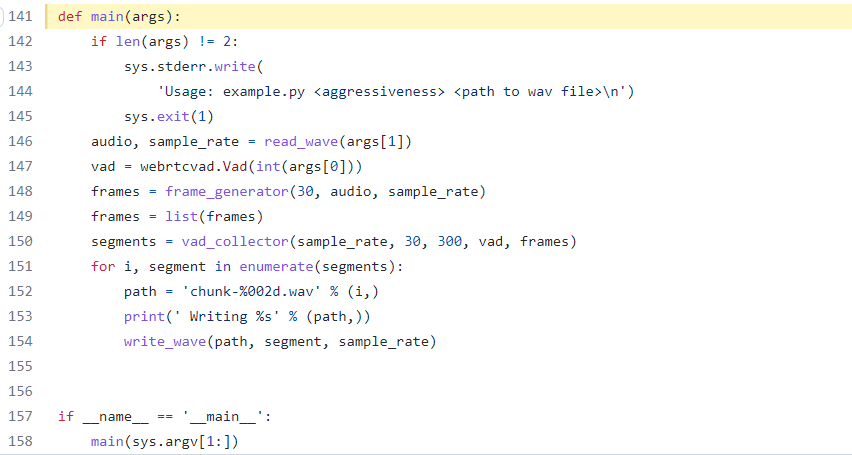
6.1.2 Webrtcvad
Wenet also supports like external vad modules like from webrtcvad. It is a very great open-resource job here, the difference here is that it used more tactics to do the audio vad works instead of just pure stop-point detections.
https://github.com/wiseman/py-webrtcvad
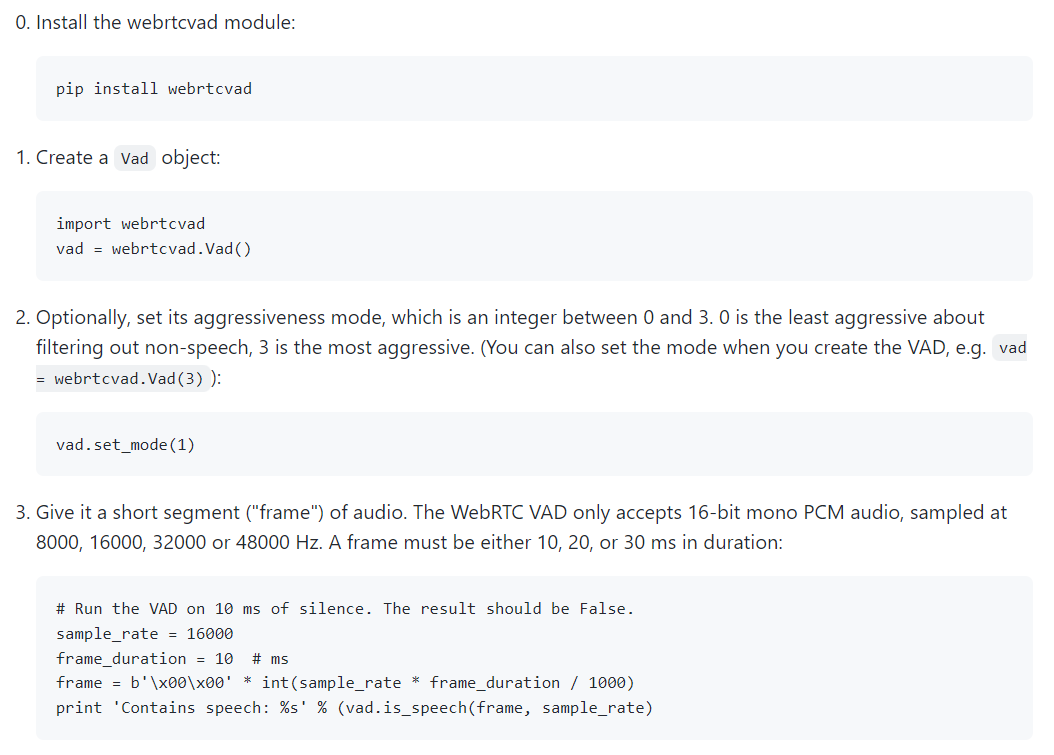
The way it works are very direct, it will detect whether there is the silent audio.
6.2 Python Deployment
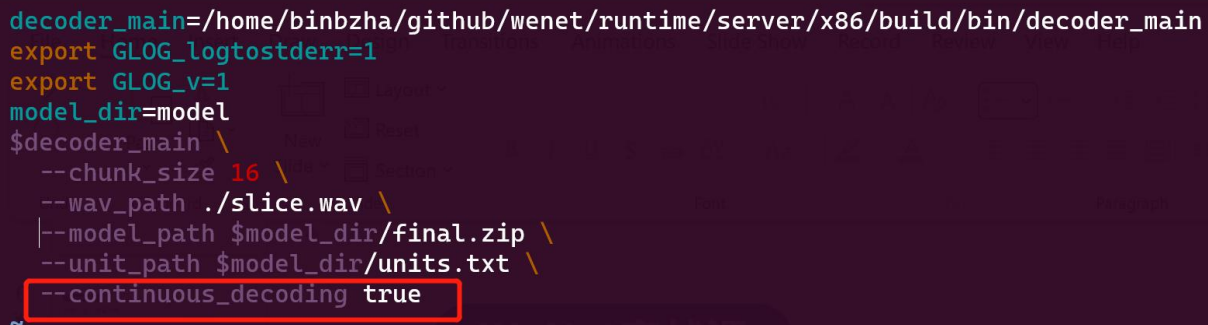
The easiest way is to just call the continous_decoding param and set it as True. If we set this as False, there can be no stops of our recognition texts, and at the same time, there will be a faster speed to decode since there is no endstop detection.
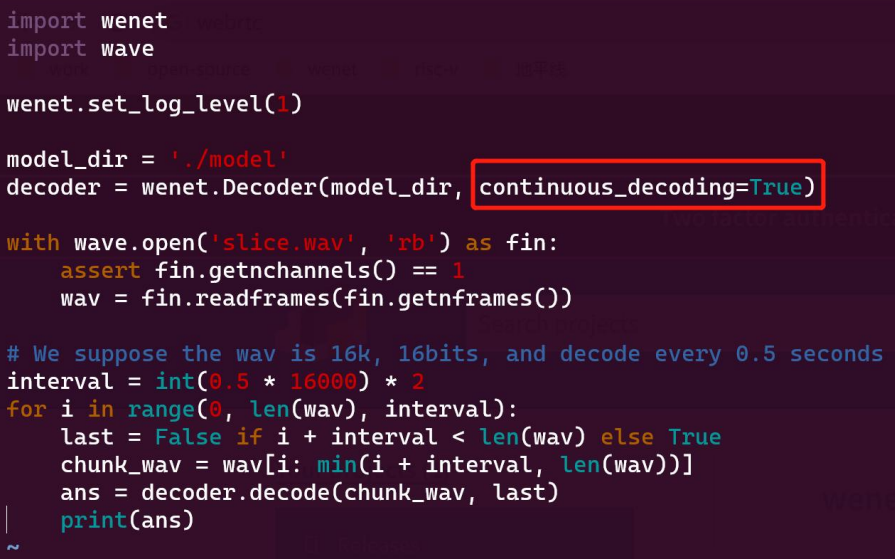
We will use a streaming way that we will input the audio chunks in every 0.5 seconds. We decode the audio file in each 0.5 seconds each time, it will like the streaming way. The delay in the streaming ASR jobs will always like between 500ms to 600ms, so it will be limited on there speech recognition accuracy.
6.3 Use C++
We can easily use the C++ to do the long-time audio ASR by just selecting the continous_decoding into True: